


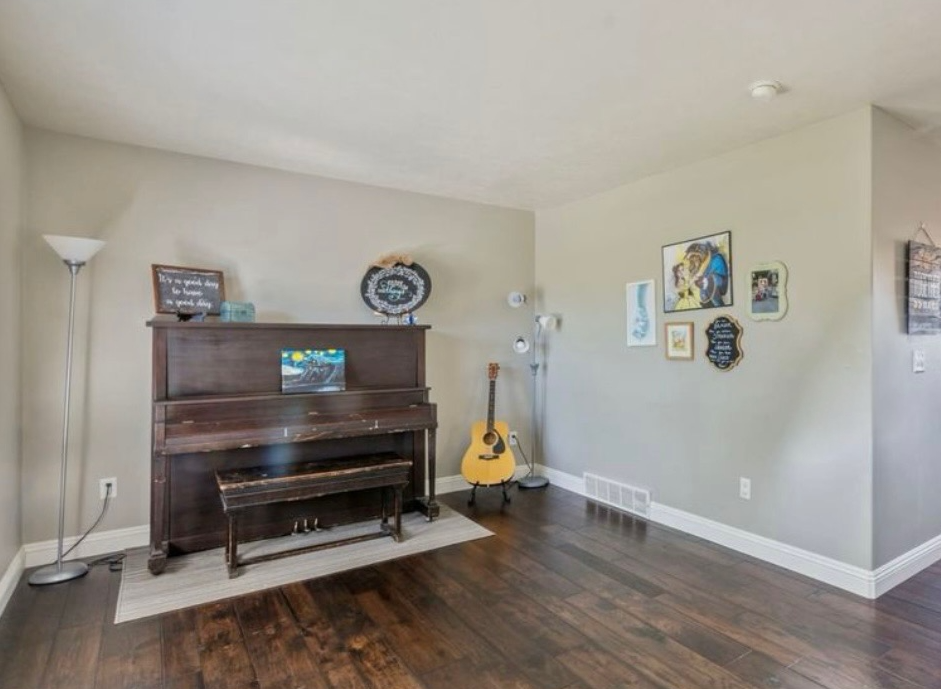
BEFORE
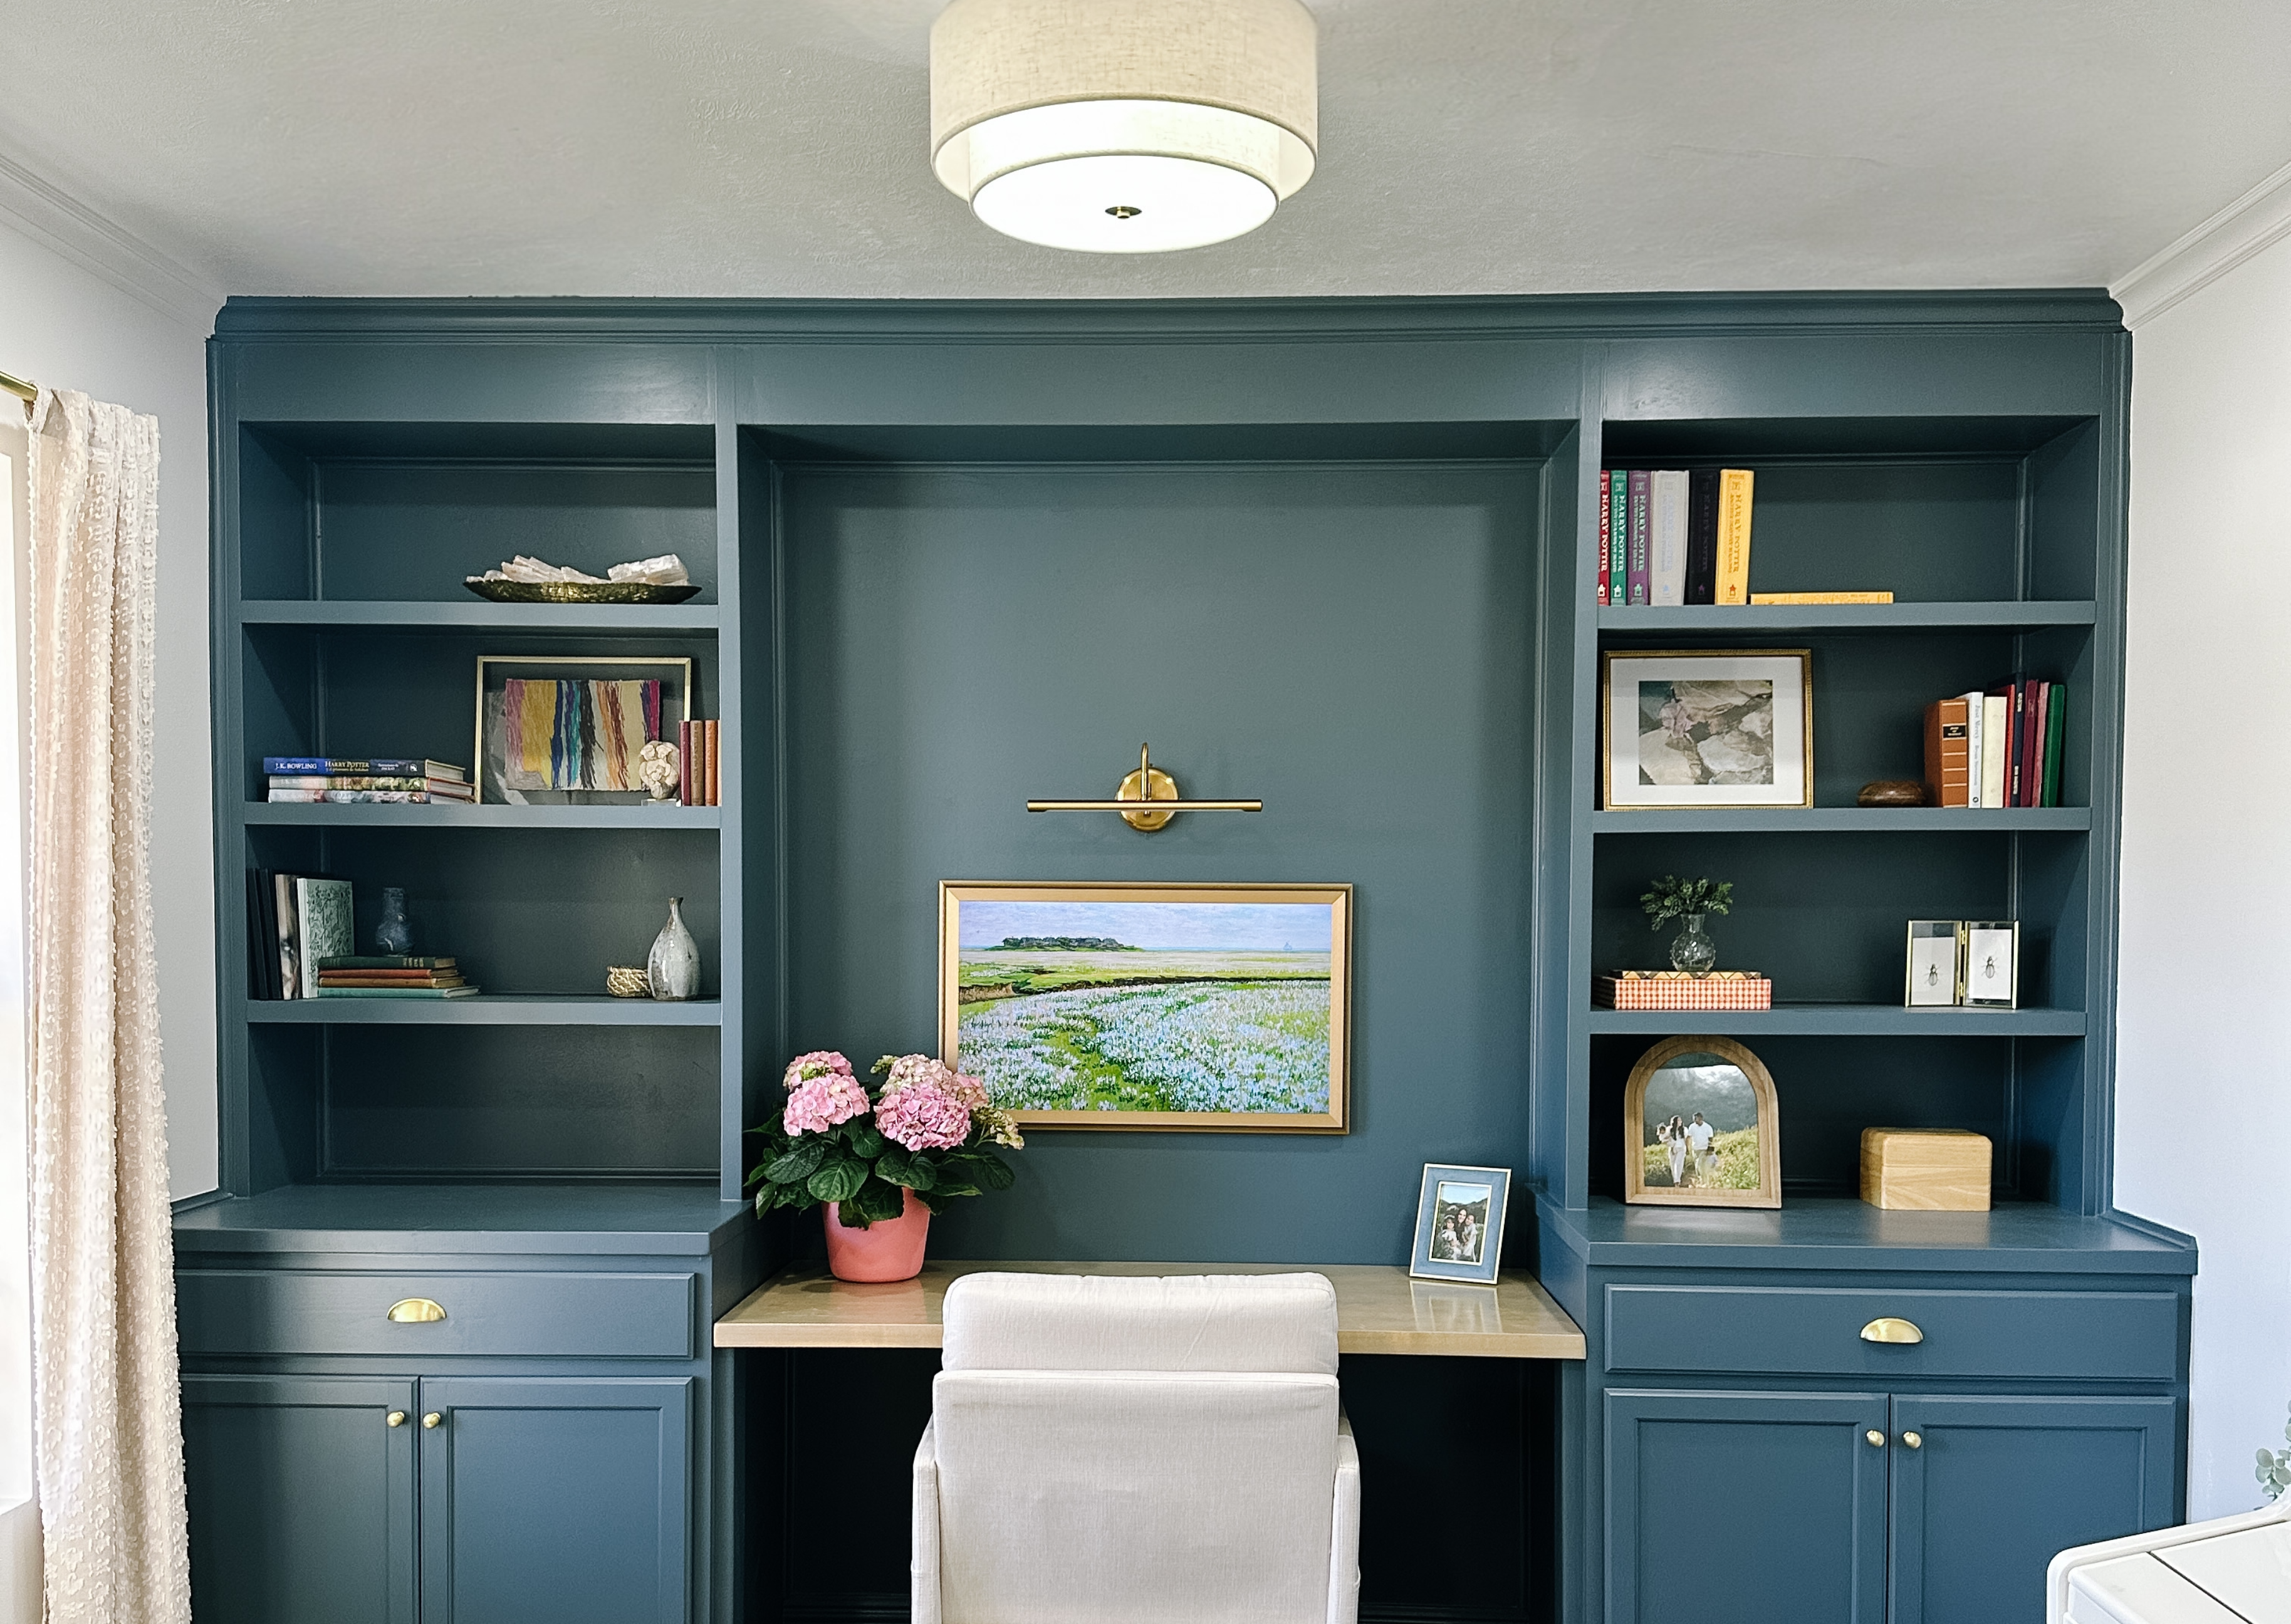
AFTER

A blank wall is more than just an empty space—it’s an opportunity to create a multifunctional area that serves both your style and practical needs. If you’re looking to design a space that combines work, entertainment, and décor, turning a blank wall into a built-in desk with lower cabinets, shelves, and a TV screen as digital art and a computer monitor could be your ideal solution. This transformation will not only enhance your home’s functionality but also add personality and flair.
STEP 1: ASSESS THE SPACE
Before diving into design, take a moment to evaluate the available space on your wall. Measure the length and height to determine the dimensions for your desk, cabinets, and shelves. Consider how much space you need for your work surface, storage, and your TV screen. Think about how you plan to use the space—will it be a dedicated home office, a multifunctional area for both work and relaxation, or a creative zone for digital art?
***Tip: Make sure to leave enough room for comfortable movement, especially if the space will serve multiple purposes.
STEP 2: CHOOSE THE RIGHT MATERIALS
The materials you choose will define the overall look of your built-in desk and storage. Select finishes that complement your room’s existing décor:
For the Desk Surface: Choose durable wood, plywood, or even a solid surface like quartz for the desk top.
For the Lower Cabinets and Shelves: Wood or MDF is an excellent choice for cabinets and shelving units. Paint or stain these materials to fit your desired color scheme.
For the TV Screen Mount: Select a sturdy wall mount that can hold your TV at eye level. The mount should be adjustable, allowing the screen to be tilted for optimal viewing whether you're working or enjoying digital ar
STEP 3: DESIGN THE LAYOUT
Next, design the layout of your desk, cabinets, shelves, and TV screen. Think about how to maximize both workspace and storage while integrating the TV as a feature.
***Tip: Plan where power outlets and cables will go to keep the area tidy and organized. You might want to incorporate cable management solutions to ensure that wires remain hidden.
STEP 4: BUILD THE DESK AND STORAGE UNITS
Once you have a plan in place, it’s time to build or install the desk and storage components.
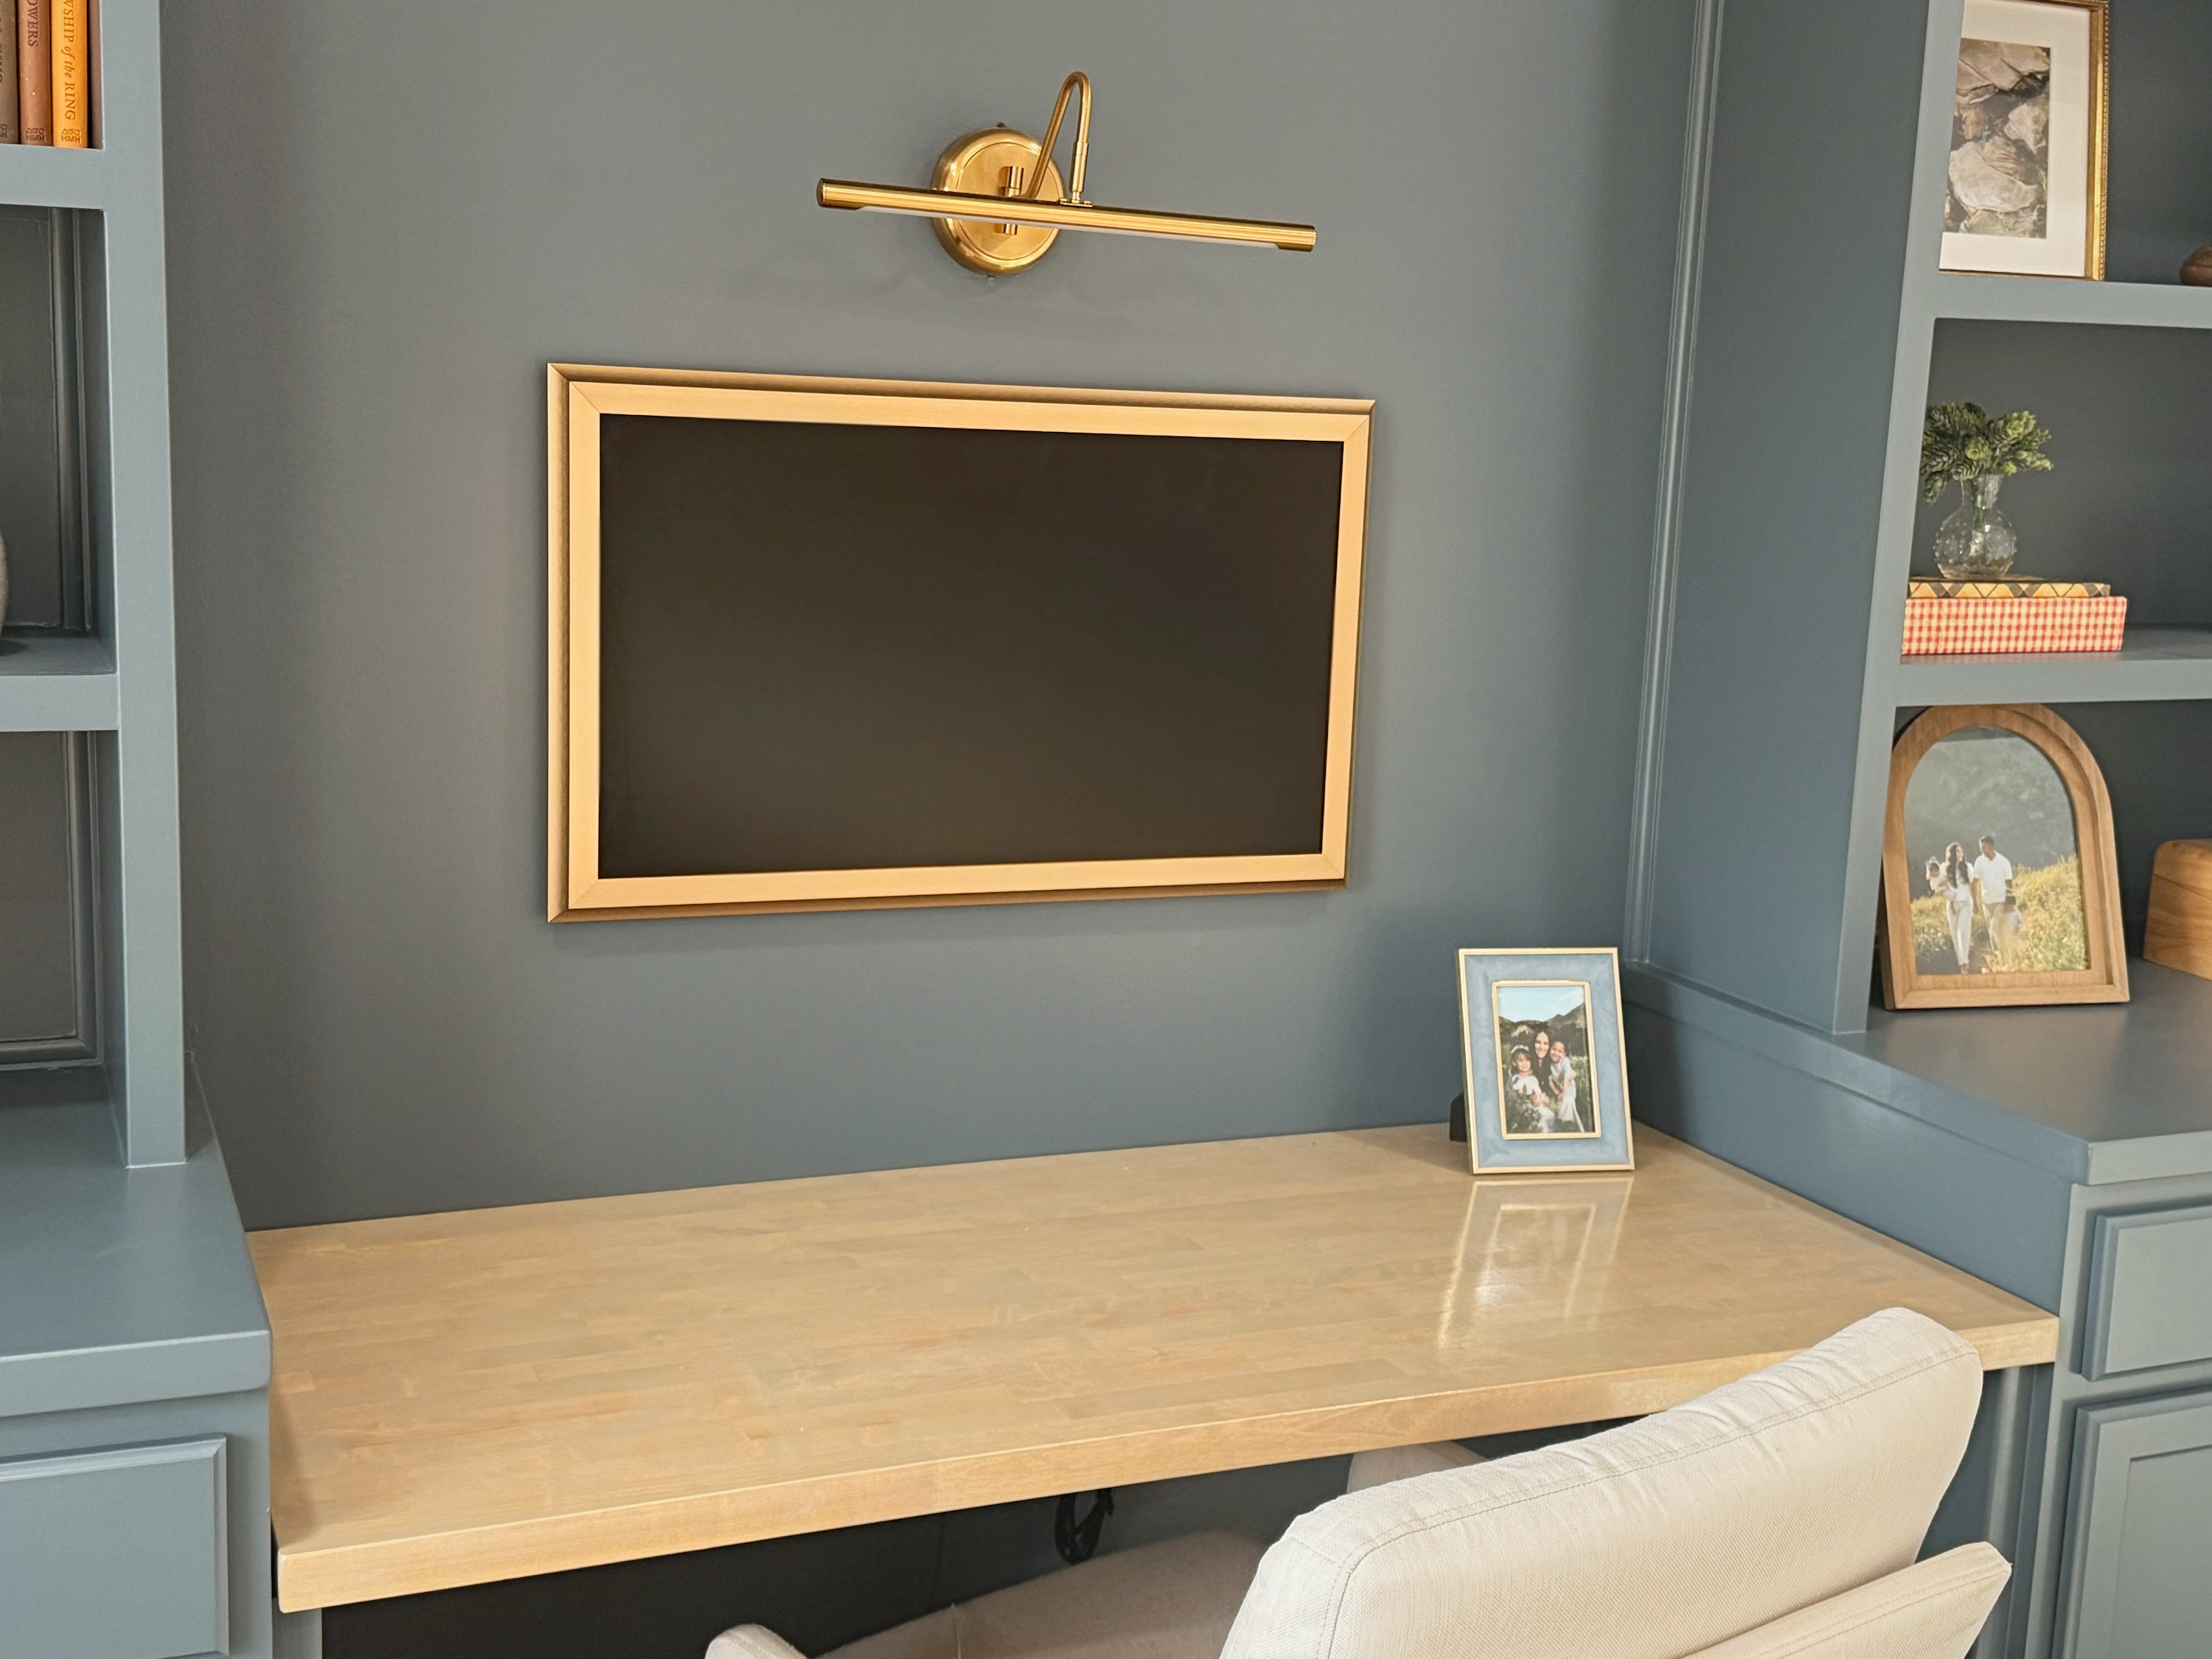
STEP 5: INTEGRATE THE TV AS DIGITAL ART AND COMPUTER MONITOR
One of the best ways to use the TV in this setup is by turning it into a dual-purpose screen: a computer monitor during work hours and a dynamic art display when you’re relaxing.
Tip: Set the TV to a “screen saver” mode when it’s not in use to automatically cycle through digital artwork.
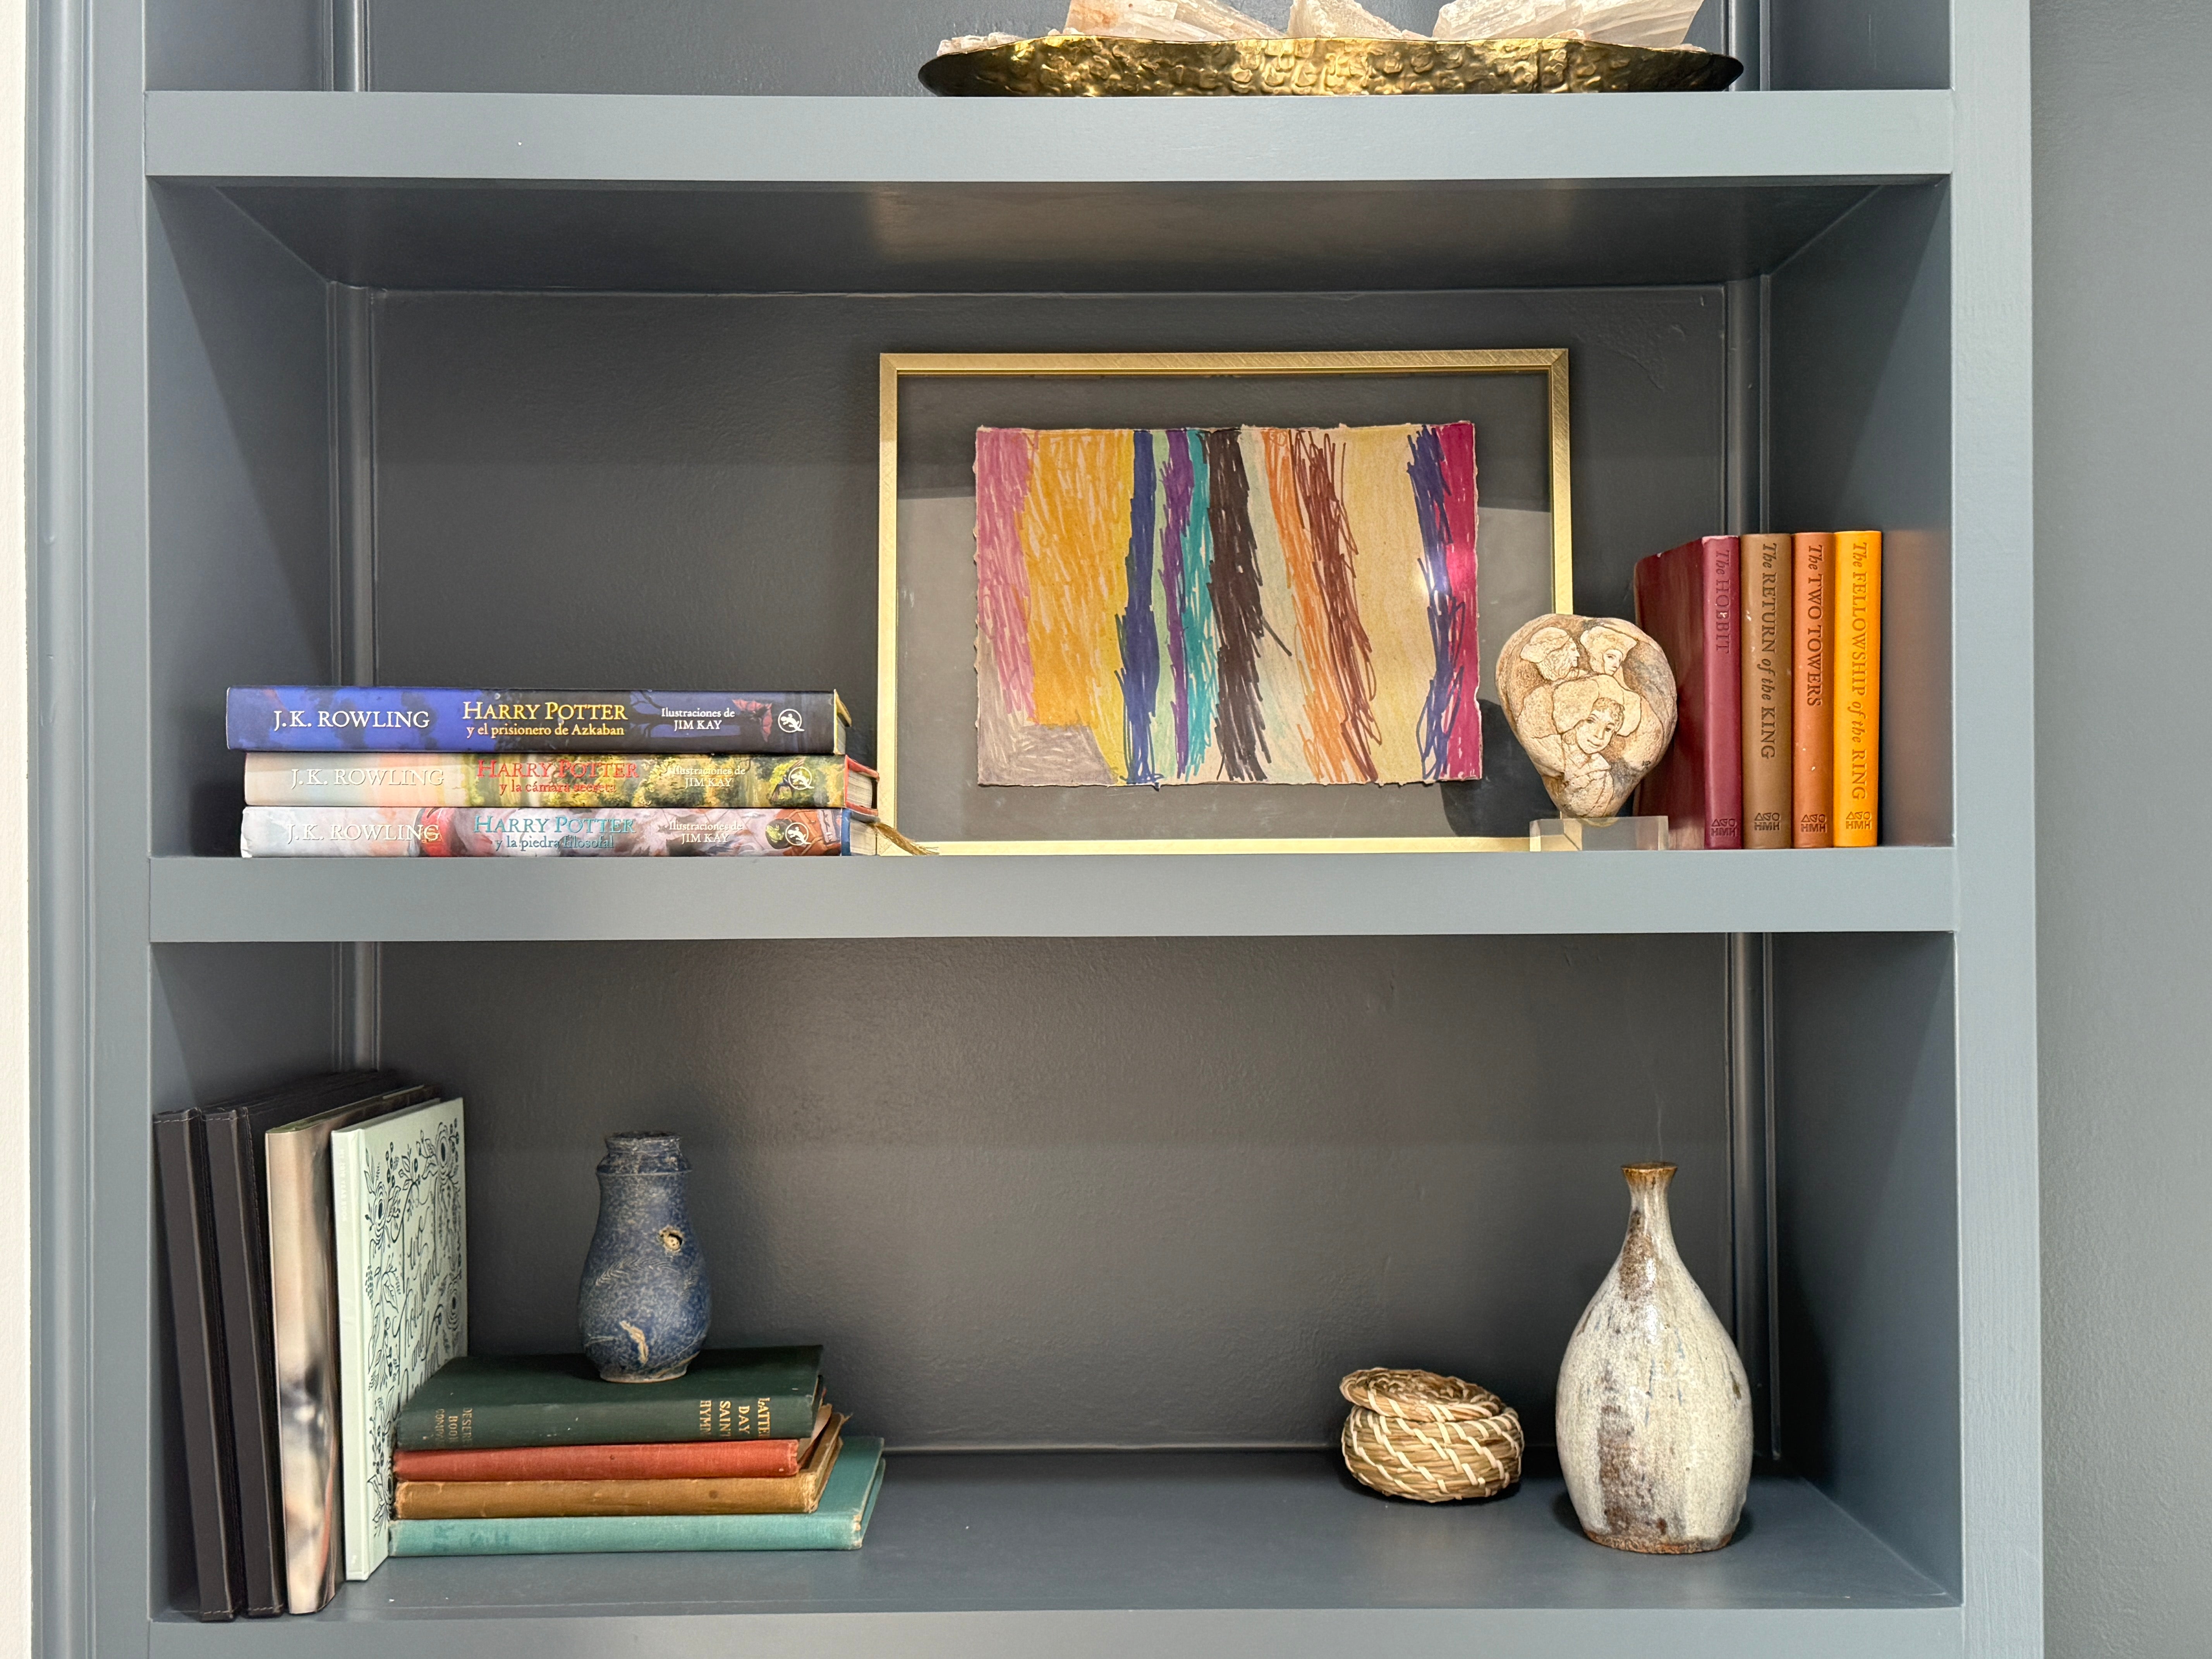
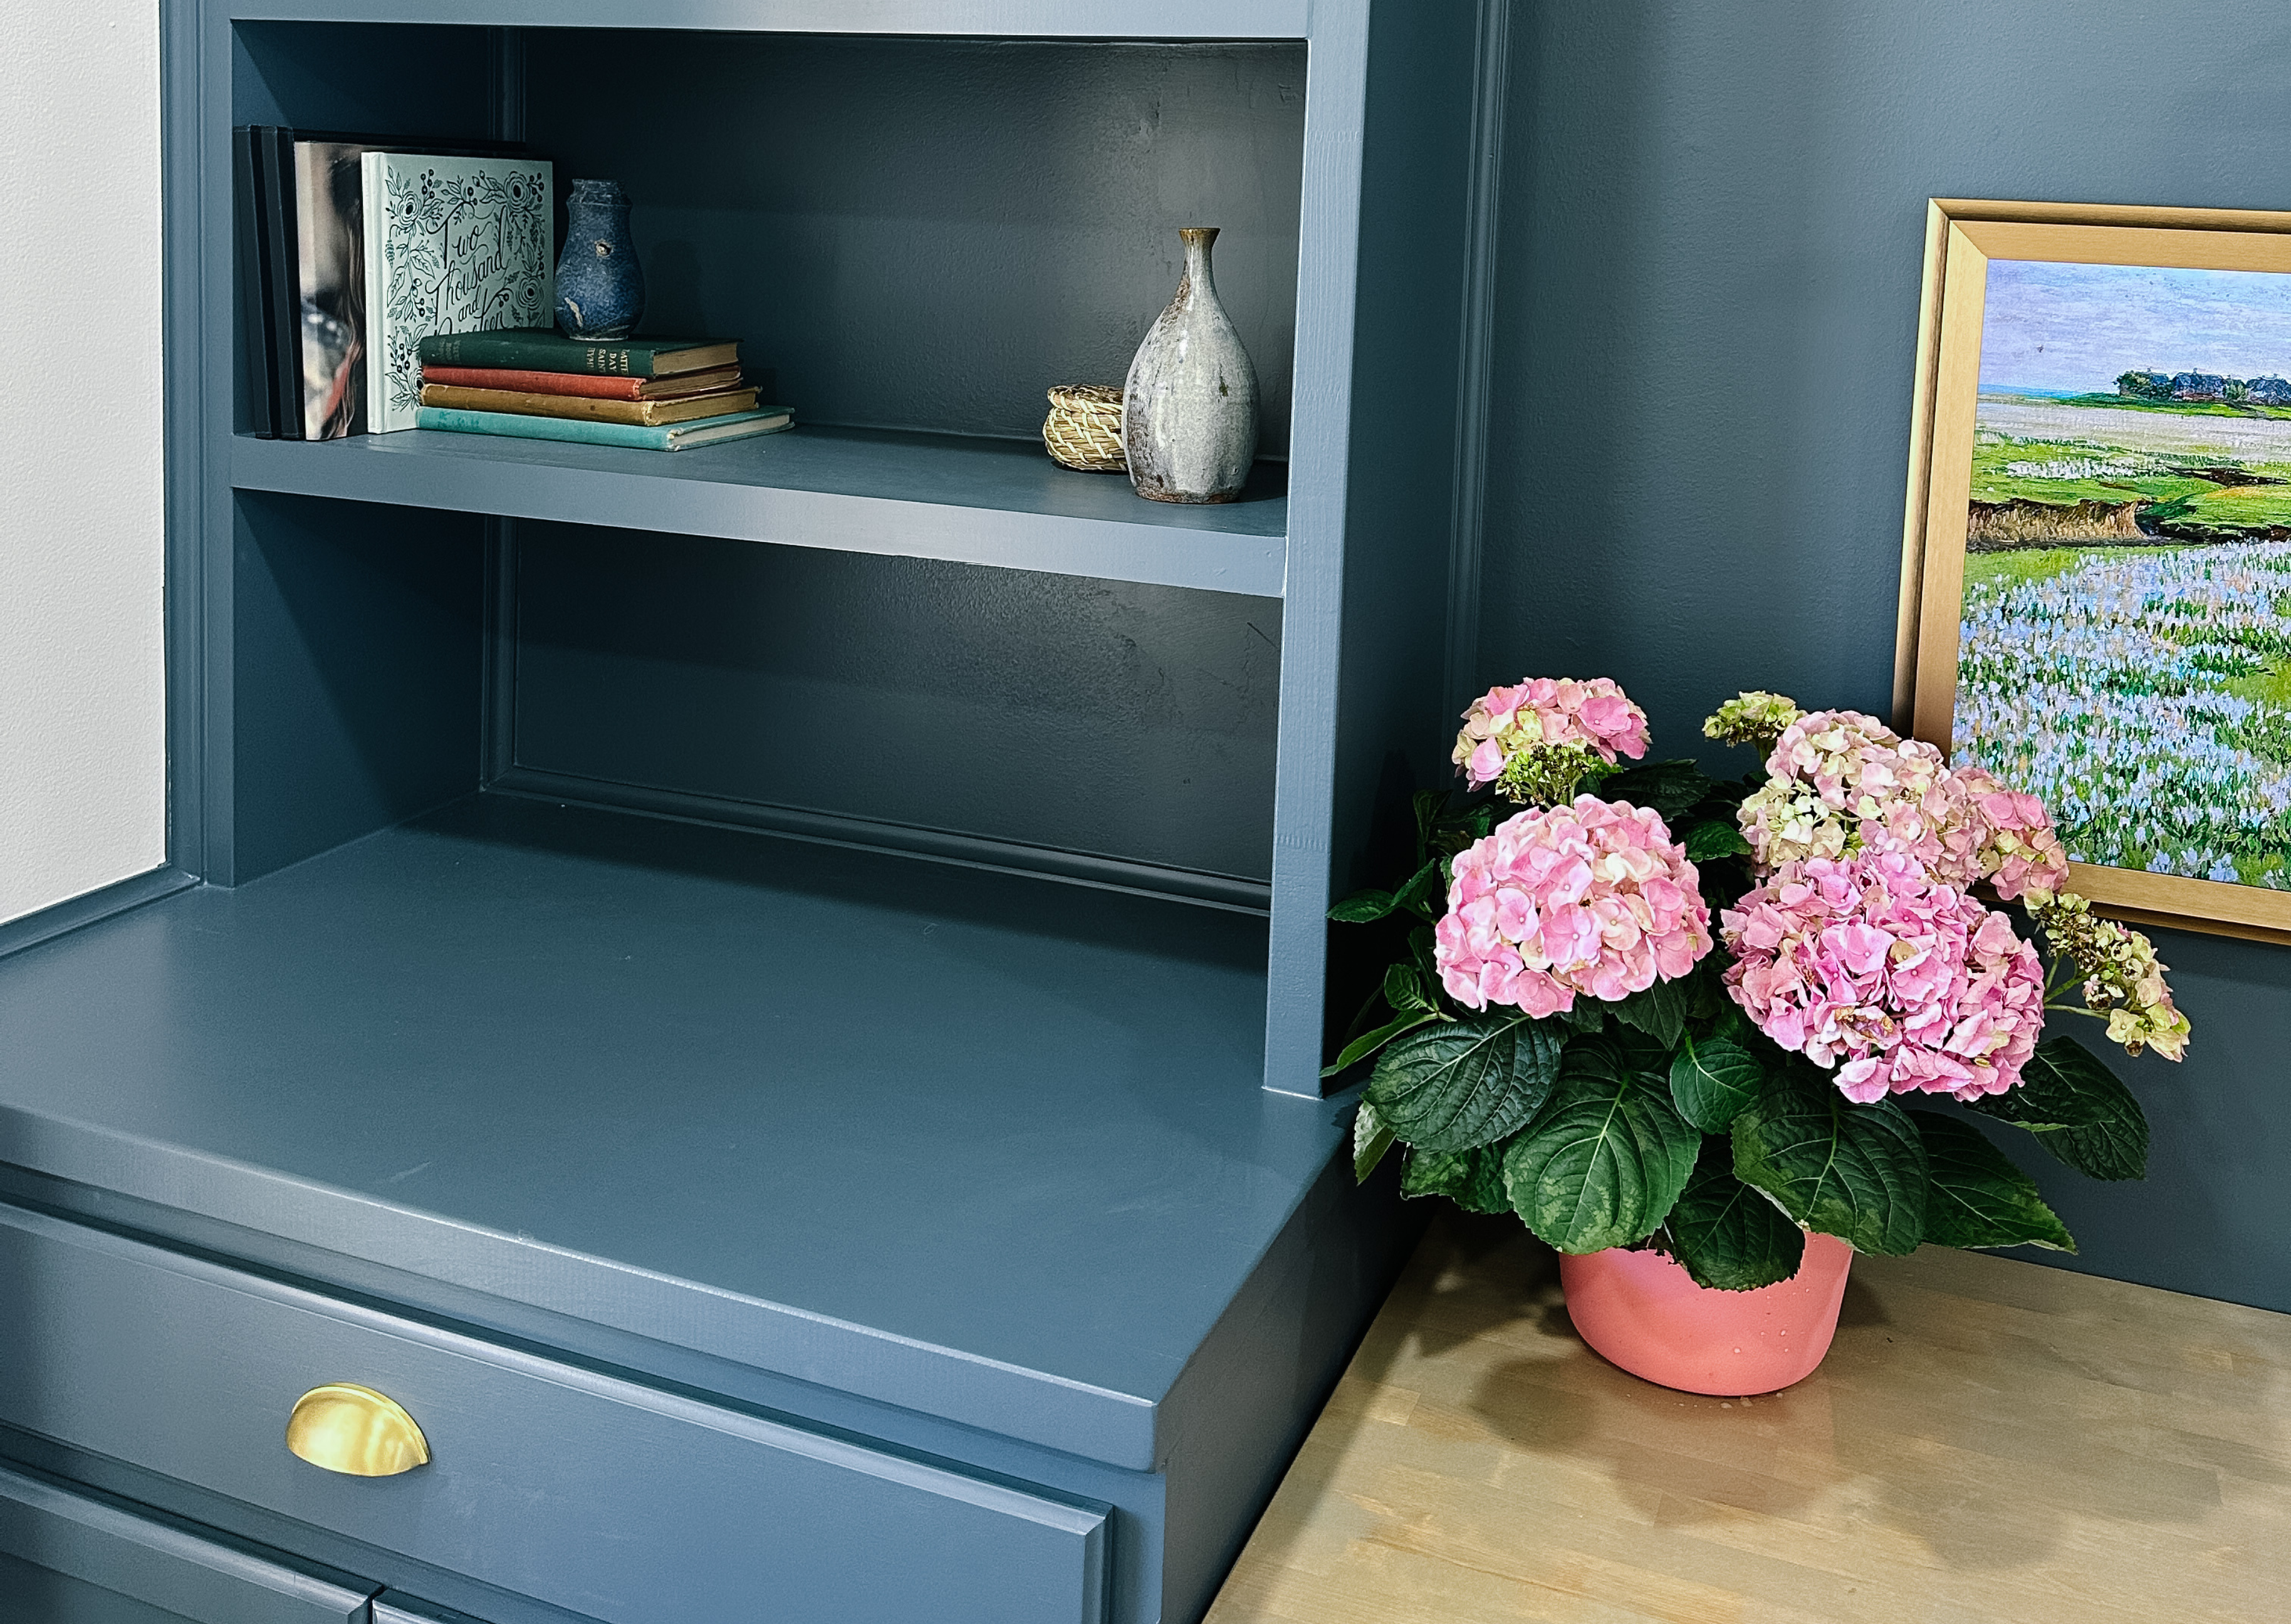
STEP 6: ADD BOOKS AS DECOR
Books are not only practical but can also be a stylish addition to your built-in design. Use them to add personality, texture, and color to your space.
***Tip: Add a few personal or coffee table books with vibrant covers to reflect your style and interests. These can act as conversation starters as well.
STEP 7: ADD FINAL TOUCHES
Once the major pieces are in place, it’s time to finish off the look:
By transforming a blank wall into a built-in desk with lower cabinets, shelves, and a dual-use TV screen, you’ll create a multifunctional, stylish space that perfectly balances work and relaxation. The addition of books as décor further enhances the space’s charm, giving it personality and warmth. This transformation not only makes the most of your wall but also maximizes functionality and design in a way that suits both your lifestyle and your aesthetic preferences.
With these simple steps, you can create a beautiful, organized, and flexible home office or creative zone that’s both practical and inspiring.
Shop directly on Amazon for the products used!
The paint color is Sherwin Williams Grays Harbor.
Desk chair is from Walmart.

White paint is a design classic—effortless, elegant, and endlessly versatile. A well-chosen white never goes out of style, making it one of the most timeless color choices for interiors. However, not all whites are created equal.
Learn more
A black-and-white foundation ensures the bedroom remains stylish and age-appropriate for years to come.
Learn more
Scale is one of the most important principles in interior design, yet it’s often overlooked.
Learn moreYour cart is currently empty.
Not sure where to start?
Try these collections: